
In my last post I wrote about Travis CI: Travis CI overview. In this post I want to write how to use Travis CI for Python/Django project.
I started to be interested in Travis CI when I decided it’s time for some continuous integration for my recent side project - frisor (firsor repo).
Quick reminder what is frisor
Frisor is a web application in Python/Django which is just a box for interesting urls. When using untrusted network I don’t want to login anywhere to save interesting content I found. More about this is here: Introduction to frisor.
Here is Travis CI support file for my project: travis support file.
And here is my Travis CI build status:

I also configured code coverage for my build:

Travis CI configuration for Python language
To define how application build should be performed,
we need to create .travis.yml file. It has to contain three parts:
- Declaration of language or technologies used
- Install instructions - for installing necessary dependencies
- Script instructions - for building
How to declare Python language in .travis.yml?
In .travis.yml you should define language you use using language tag:
language: pythonThen define Python versions - default is 2.7:
    python:
        - 3.4
        - 3.5
        - 2.7
Build will be performed for all declared versions. Travis CI uses virtualenv for Python environments (for each declared Python version there will be a separate one). After declaring a language, we need to write commands which should be executed when installing dependencies.
Installation part of .travis.yml
It’s recommended to install necessary dependencies by pip, not apt-get.
If you want apt-get (for example for numpy or matplotlib libraries) you need to
use before_install tag, for example:
    before_install:
      - sudo apt-get -qq update
      - sudo apt-get install -y python-numpy
By default these libraries are preinstalled:
- pytest
- nose
- mock
Default instruction for installing part will be performed when you don’t write it at all:
install: pip install -r requirements.txtFor some small projects it can be enough, so don’t forget to add requirements.txt file
to your repository!
Multiple Django versions support in .travis.yml
Python projects quite often come with Django framework. If you are using only
one version of that library, it’s enough to install it by adding it
to requirements.txt.
But if you want to test against multiple versions,
you can add environment variables (remember, Travis CI will create a build
matrix for all Python versions and env variables for your project):
    env:
      - DJANGO_VERSION=1.7.8
      - DJANGO_VERSION=1.8.2
Then in your install instructions you should use DJANGO_VERSION environment variable
for installing proper version of Django, for example:
    install:
      - pip install -q Django==$DJANGO_VERSION
      - pip install -r requirements.txt
You can use the same way for managing multiple versions of other libraries too.
Script part of .travis.yml for Python
There is no default script part - build will fail if your .travis.yml doesn’t contain it.
Usually you just want to run tests:
    script: # pick one you use for running tests
        - pytest
        - nosetests
        - python -m unittest
For project in Django it can look like this:
script: python manage.py testCode coverage in Travis CI for Python
For code coverage you will need to install necessary tools first:
    install:
      - ...
      - pip install coverage
      - ...
Then, after successful build run code coverage tools:
after_success: coverage reportIt’ll print coverage results into Travis CI console:
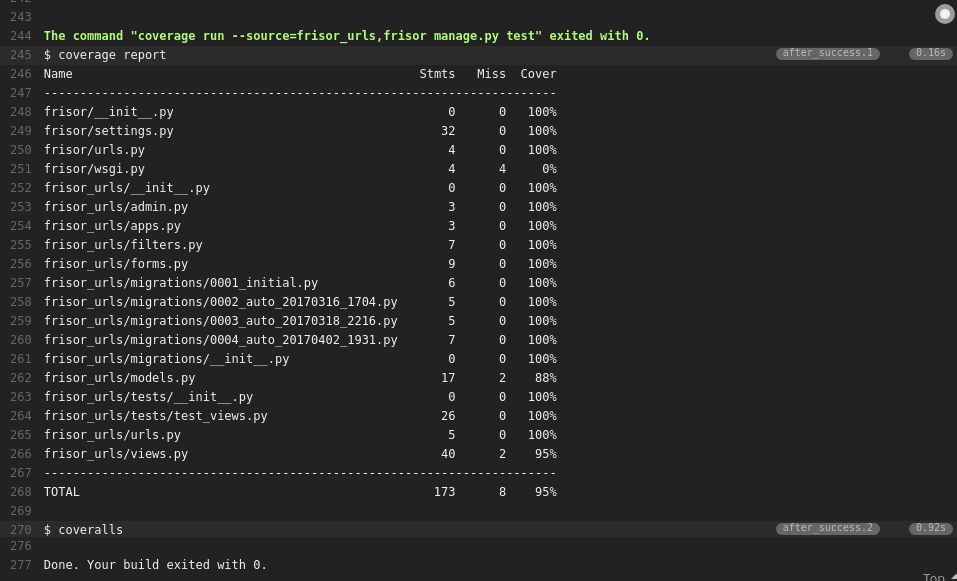
Of course you can’t forget to use coverage run when running your tests!
Usually it means that you should change Travis CI script commands a bit, for me
it looks like:
script: coverage run manage.py testThere are tools
like coveralls which can help you with showing coverage results for your
repository. It comes with some nice badges:
![]()
It can also put information about code coverage in pull requests. More about it on coveralls.
Summing up
Adding Travis CI support for Python/Django project is easy, especially
if you follow good practices for this technologies like using
virtualenv and having dependencies in some requirements file.
There are plenty other useful tools which can be integrated with Travis CI like tools for code coverage, slack integrations, email notifications, etc. For side projects it is more than enough. For commercial ones I’ve never used Travis CI, but it happen I used other integrations existing on github.


Leave a Comment